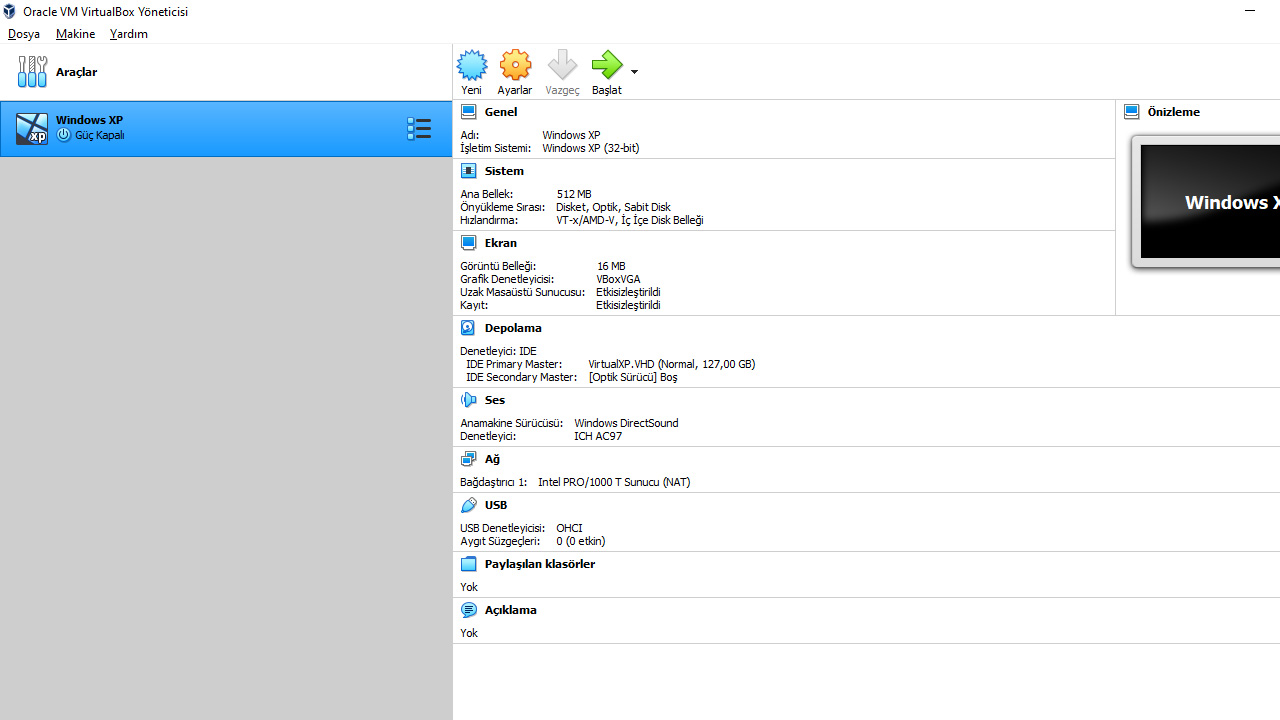
Although Microsoft’s once-legendary Windows XP operating system has long been shelved, it still has a place in the hearts of many of us. There are some easy ways to reuse the Windows XP operating system for free today. How to set up a Windows XP virtual machine in this content? We take a closer look at it step by step.
The operating system that many of us first met with Windows in our childhood or adulthood Windows xphas been put on the shelves of history for quite some time. But there are still ways to run this nostalgic operating system on our systems today, and these methods are actually quite simple.
With the virtual machine creation method, many old or current operating systems can be recreated on Windows or Linux computers. Although this process may seem confusing and scary at first, it actually consists of very simple steps. Bride How to create a Windows XP virtual machine in Windows 10? Let’s take a closer look and go on a nostalgic journey with the Windows XP virtual machine we have created together.
Step-by-step Windows XP virtual machine setup:
- Step # 1: Download the Windows XP “exe” file from Microsoft’s official site.
- Step # 2: Download and install the 7-Zip application.
- Step # 3: Create an empty folder named Windows XP anywhere you want.
- Step # 4: Right click on the Windows XP.exe file and click “7-Zip / Open Archive / cabFollow the path ”.
- Step # 5: Double click on the “Sources” folder, then the “xpm” file.
- Step # 6: Select all files and click the Extract button.
- Step # 7: Select the folder you created earlier and press OK.
- Step # 8: Open the folder and open the VirtualXPVHD file VirtualXP.VHD rename.
- Step # 9: VirtualBox Download and install the app.
- Step # 10: Open the VirtualBox application and click the “New” button.
- Step # 11: Click on the “Expert Mode” button.
- Step # 12: Enter the information of your virtual machine as seen in the image.
- Step # 13: Check the option “Use an existing virtual hard disk file” and click the icon next to it.
- Step # 14: Open the VirtualXP.VHD file that we renamed before and click the “Select” button.
- Step # 15: Press the Create button and move on to other settings.
- Step # 16: Click the Settings button and open the System menu.
- Step # 17: In the “Boot Order” section, remove the Floppy option and use the arrow keys to select the “Optical / Hard Disk / Floppy / NetworkDirectory one under the other as ”.
- Step # 18: Change the image memory to 128 MB in the Display section in the setup menu.
- Step # 19: Press the start key and your Windows XP virtual machine is ready for use.
Step # 1: Download the Windows XP “exe” file from Microsoft’s official site.
From here Microsoft Access the official site and click Download. A download menu will open. Select the “WindowsXPMode_en-us” file in this download menu and start the download process. Do not try to run the exe file you downloaded right away as it will not work.
Step # 2: Download and install the 7-Zip application.
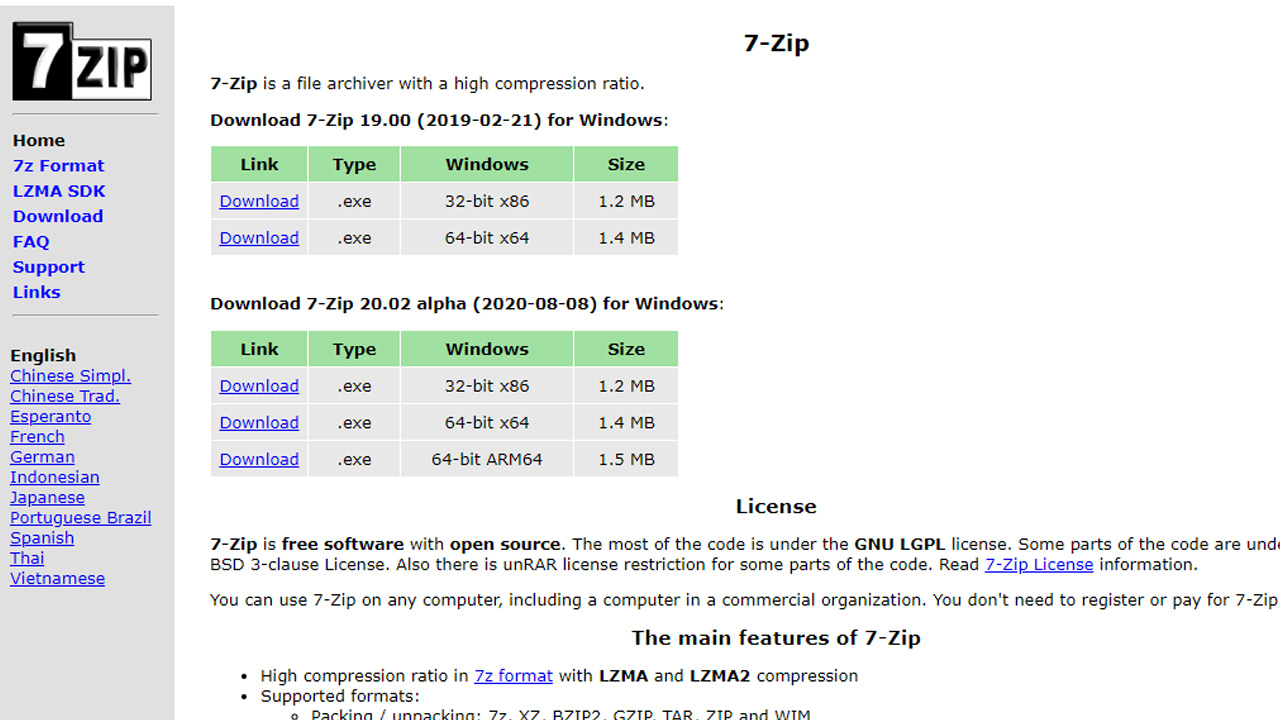
From here, access the official site of the 7-Zip application and download the appropriate version according to the bitrate of your operating system. 7-Zip application, the WindowsXPMode_en-us exe file we downloaded to us to the ingredients inside will provide the opportunity to reach.
Step # 3: Create an empty folder named Windows XP in a location of your choice.
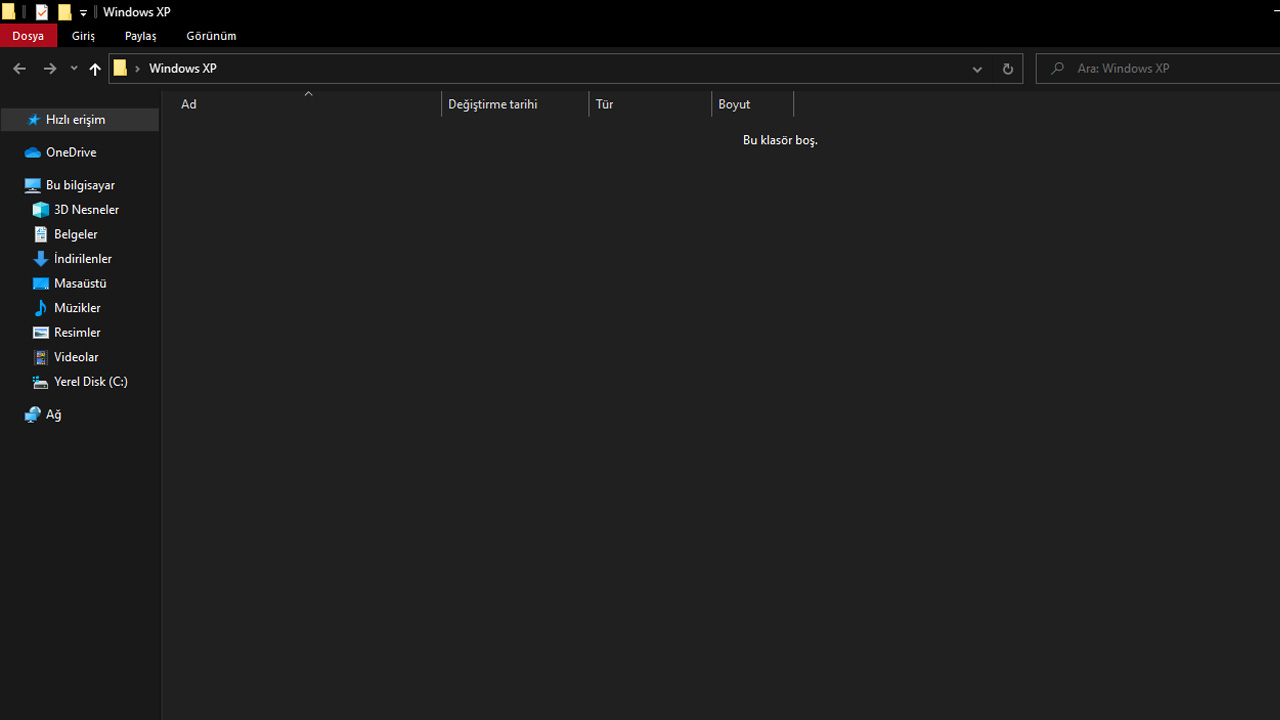
Before reaching the components in the Windows XP file we downloaded, we need to create an empty folder where we can extract these components. Create an empty folder named Windows XP to a location you want to avoid confusion later.
Step # 4: Right click on the Windows XP exe file and follow the path “7-Zip / Open Archive / cab”.
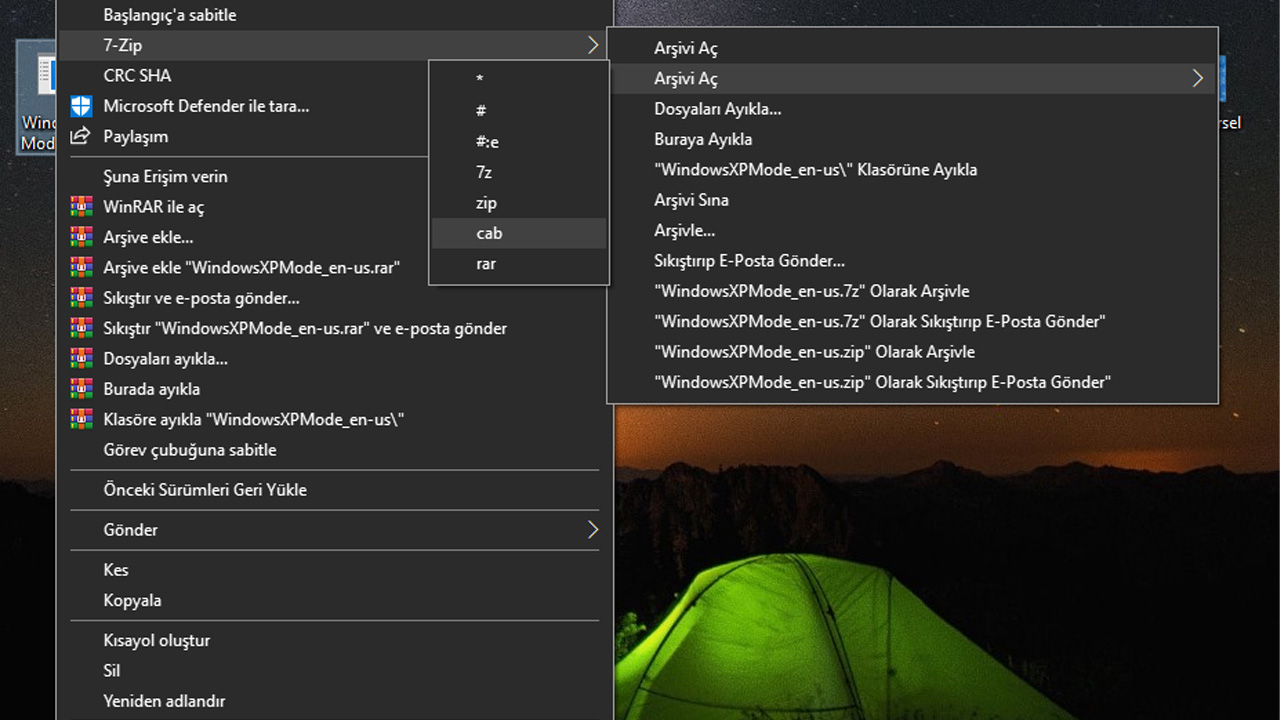
Now it’s time to use the 7-Zip application. Right click on the Windows XP exe file we downloaded and click “7-Zip / Open Archive / cabClick on the “cab” option by following the “path”.
Step # 5: Double click on the “Sources” folder then the “xpm” file.
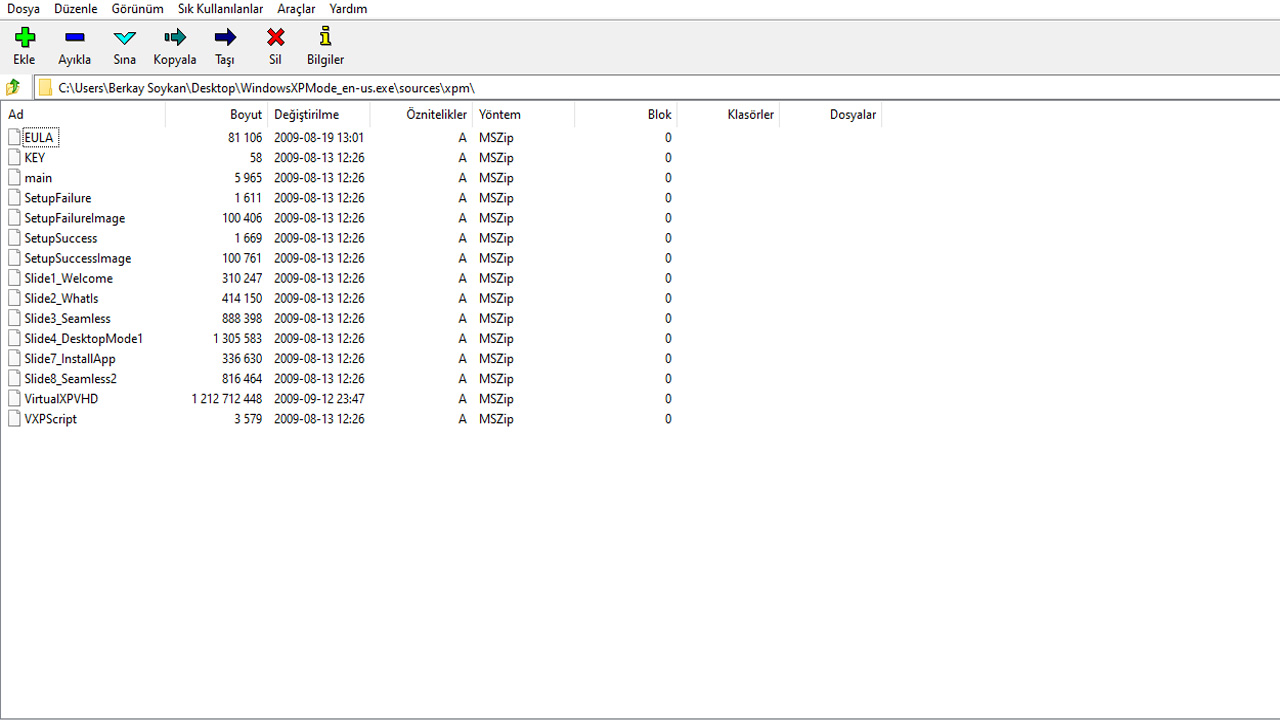
After clicking on the Cab option, a menu will open in front of you. In this window, which is very similar to the WinRAR menu, first double click the Sources folder and then the “xpm” file in the list that appears. In this way, the WindowsXPMode_en-us exe file we downloaded to all components we arrive.
Step # 6: Select all files and hit the Extract button.
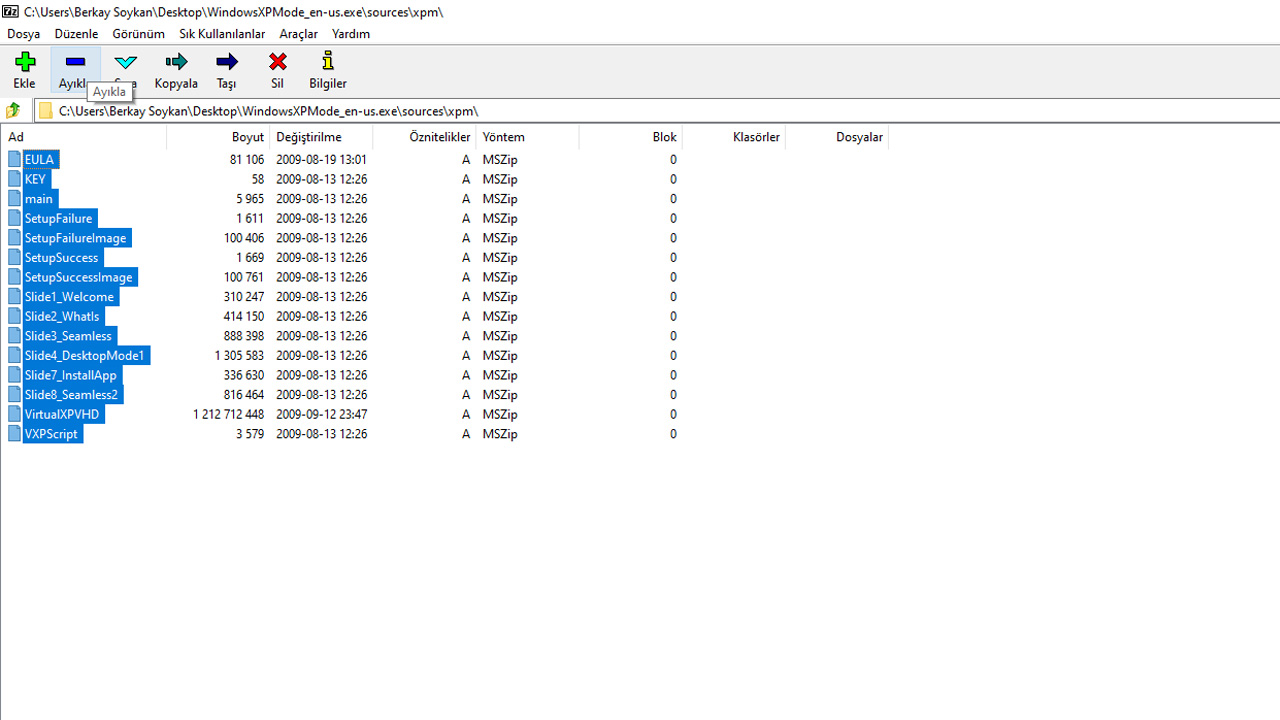
After reaching all the components with the help of 7-Zip, it is time to use the empty folder we created. Select all the files in the next window with the help of the mouse and click the Extract button.
Step # 7: Select the folder you created earlier and press OK.
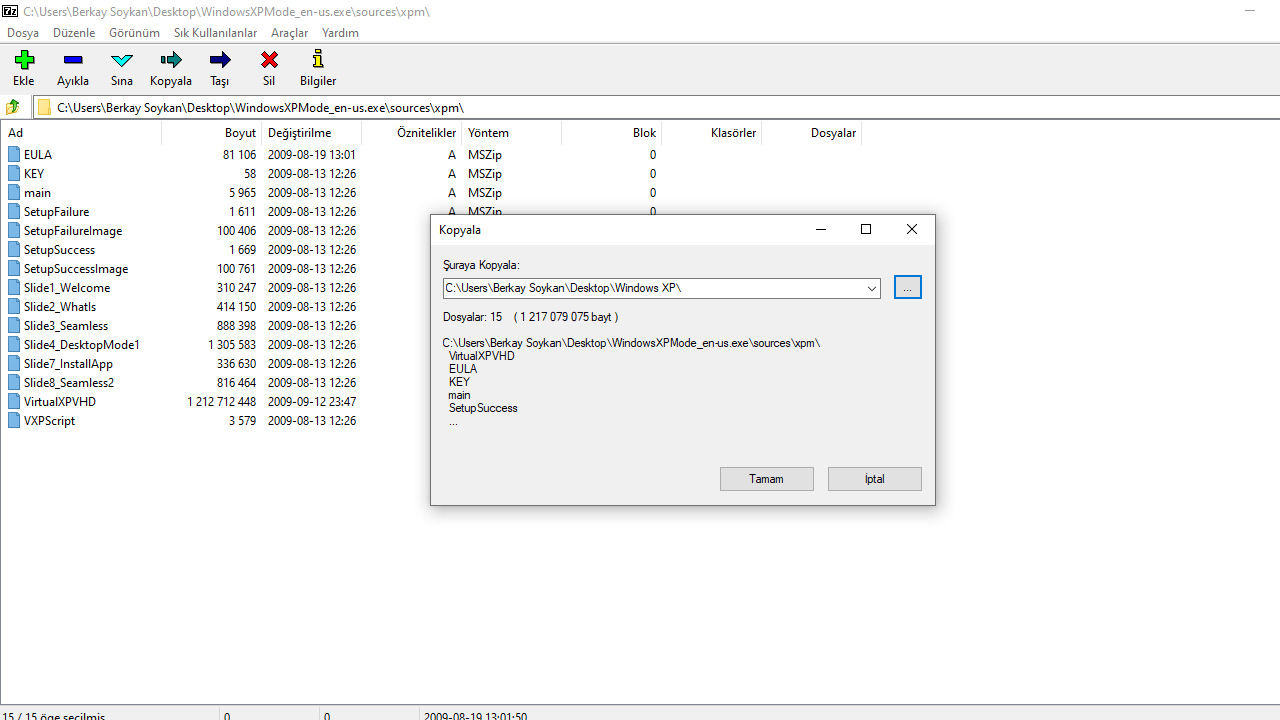
After selecting all the files and clicking the Extract button, use a choose folder is required. Here, we select the empty folder we created earlier and continue the process.
Step # 8: Open the folder and rename the VirtualXPVHD file to VirtualXP.VHD.

After extracting all the files, our work is completed with the WindowsXPMode_en-us exe file we downloaded and 7-Zip. Come to the folder where you extracted the files and create the VirtualXPVHD file we really need to create a virtual machine. VirtualXP.VHD rename.
Step # 9: Download and install the VirtualBox application.
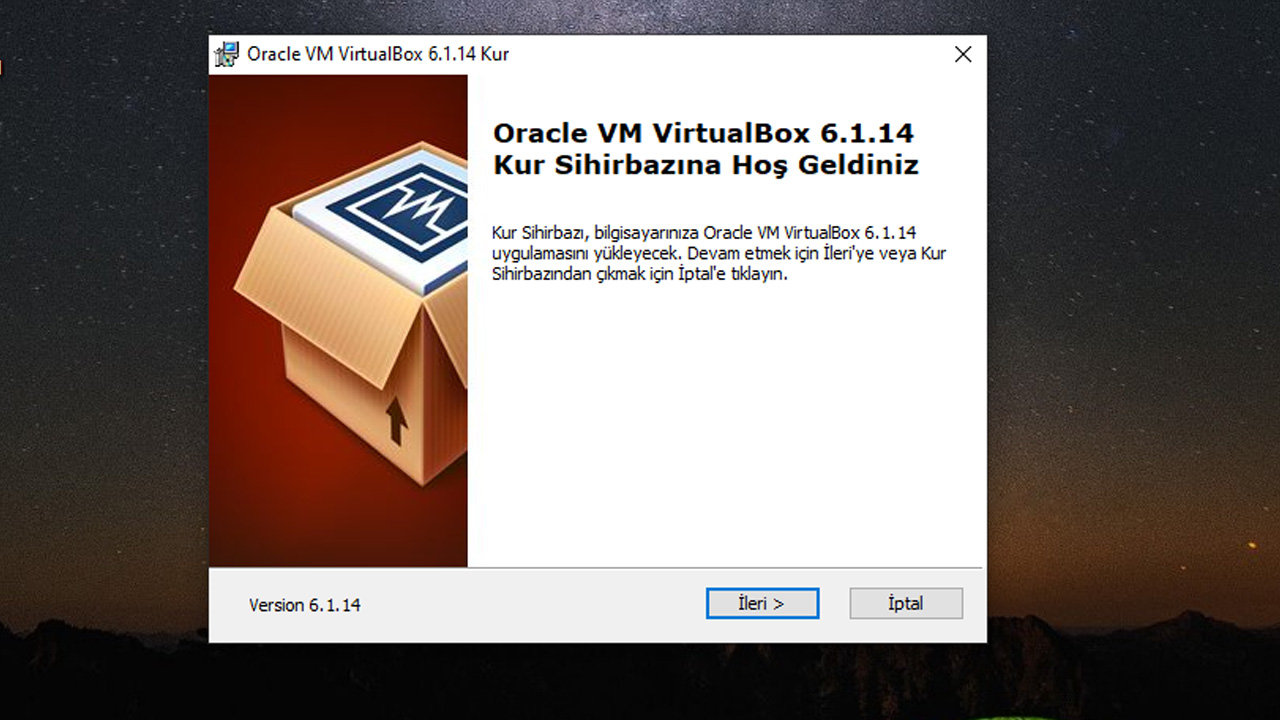
From here, access the official page of the VirtualBox application provided by Oracle and according to your operating system, VirtualBox Download version. After downloading the setup file, double-click the file and install VirtualBox as you would any normal program.
Step # 10: Open the VirtualBox application and click the “New” button.
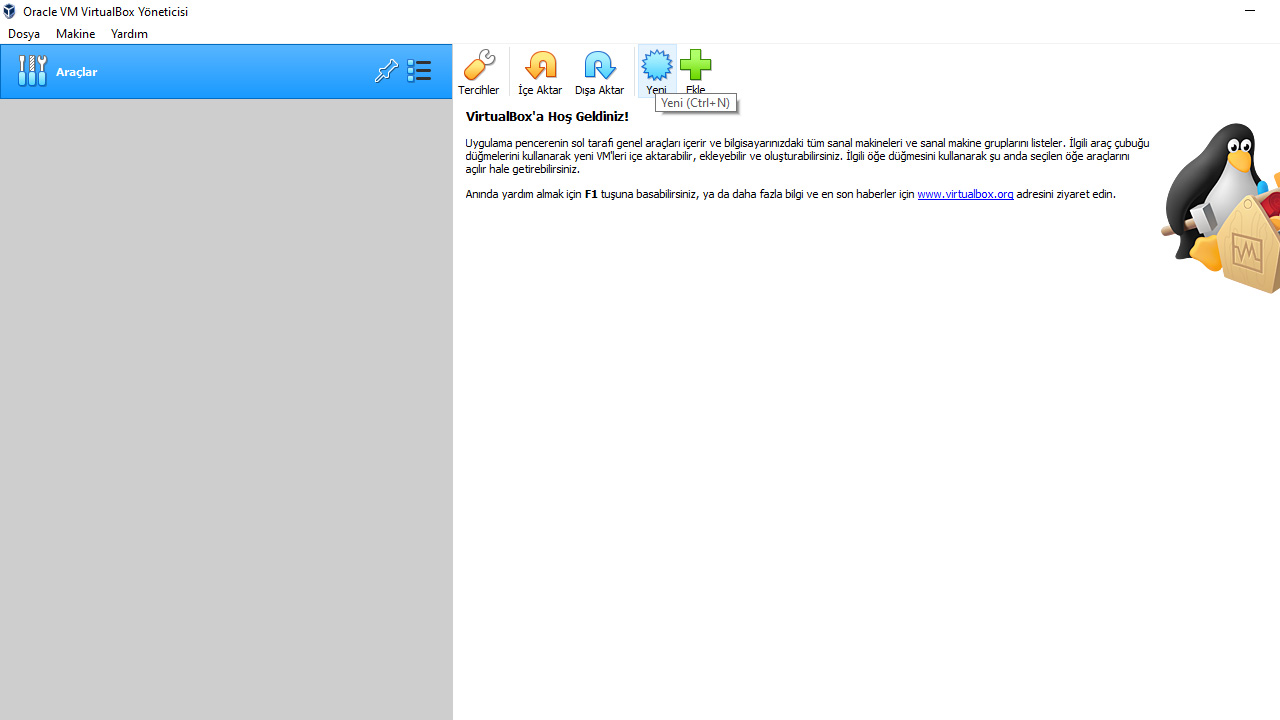
After the installation of the VirtualBox application is complete, you can now take all remaining steps. From within VirtualBox we will handle it. Run the application and start the virtual machine setup by clicking the New button.
Step # 11: Click on the “Expert Mode” button.
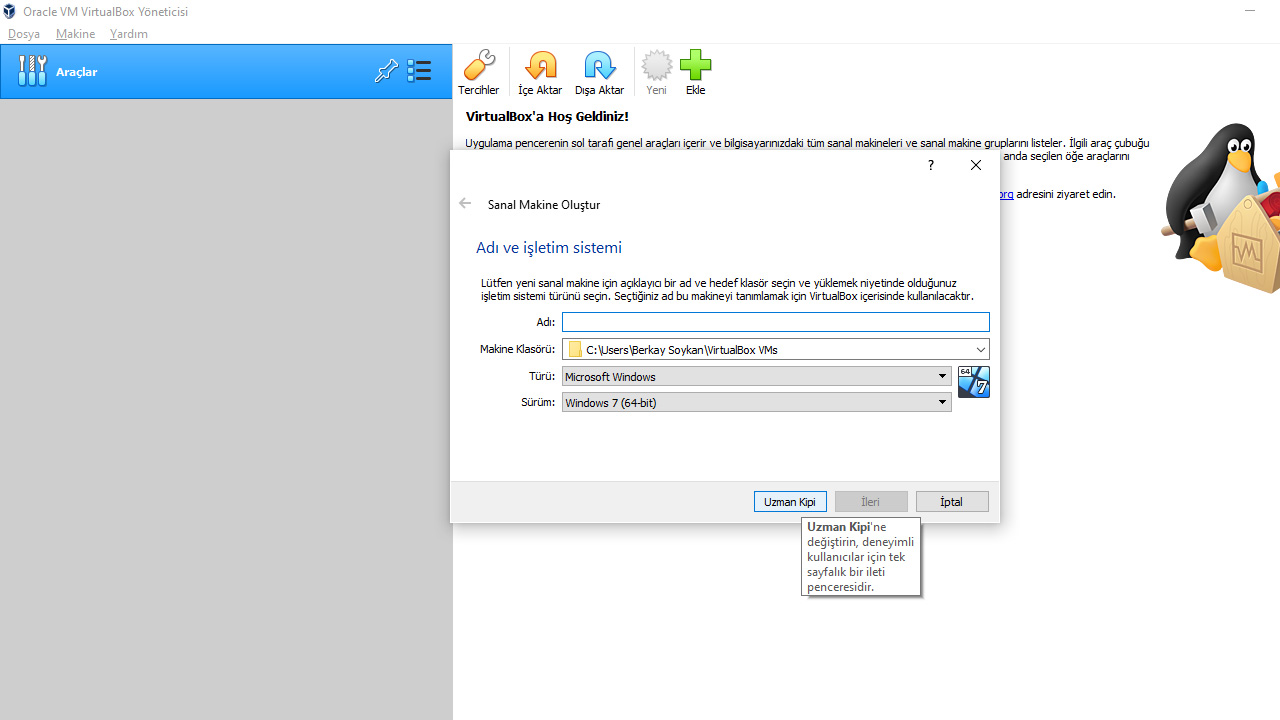
In the virtual machine creation window that appears, we click the Expert Mode button. In this way, for the virtual machine we will create to work properly customizations we can become capable.
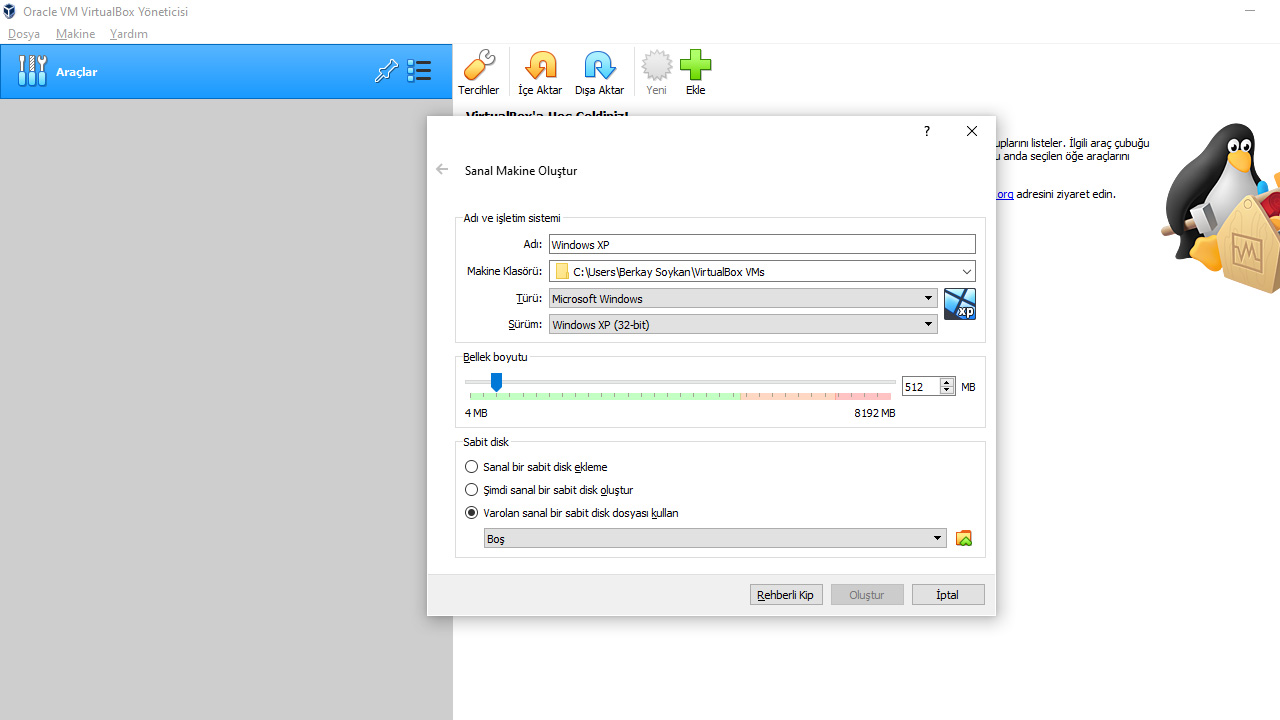
Step # 12: Enter the information of your virtual machine as seen in the image.

In order for our virtual machine to run smoothly as Windows XP, we need to make some customizations. After entering the virtual machine name in the form of Windows XP, the version part Windows XP (32-bit) Be careful. Next at least 512 MBWe specify a RAM size of 2, you can use more RAM value if you want. Then we move on to the next step for “Hard disk” part settings.
Step # 13: Check the “Use an existing virtual hard disk file” option and click the icon next to it.
In the hard disk section at the bottom, “Use an existing virtual hard disk fileWe check the option ”because we previously extracted this file with WindowsXPMode_en-us components. Then we click on the file icon with a green arrow on the side to select the file.
Step # 14: Open the VirtualXP.VHD file that we renamed earlier and click the “Select” button.

Yes, our actual virtual machine file whose name we renamed shows its main function here. We select the VirtualXP.VHD file in the folder we extracted before, click the open button and finally click the Select button. Now we have chosen our virtual machine setup file to install.
Step # 15: Hit the Create button and move on to other settings.
After completing all these steps, the Create button will become active. Click the Create button and VirtualBox will create your virtual machine directly for you. At this point, the virtual machine setup is actually finished. But our virtual machine to work properly There are settings we need to make.
Step # 16: Click on the Settings button and open the System menu.

In order for our virtual machine to work properly, we need to make a few settings first. Click the Settings button in the main menu of VirtualBox and open the System menu. In this settings menu we will few operations has.
Step # 17: In the “Boot Sequence” section, remove the Diskette option and use the arrow keys to sub-directory it as “Optical / Hard Disk / Floppy / Network”.

The first thing we need to do for the virtual machine to work properly is a proper boot chain to create. To do this, uncheck the Floppy and Network options in the Boot Order section. Then, using the arrow keys on the side, you can select the boot options “Optical / Hard Disk / Floppy / NetworkArrange one under the other, in order.
Step # 18: Change the image memory to 128MB from the Display section in the settings menu.
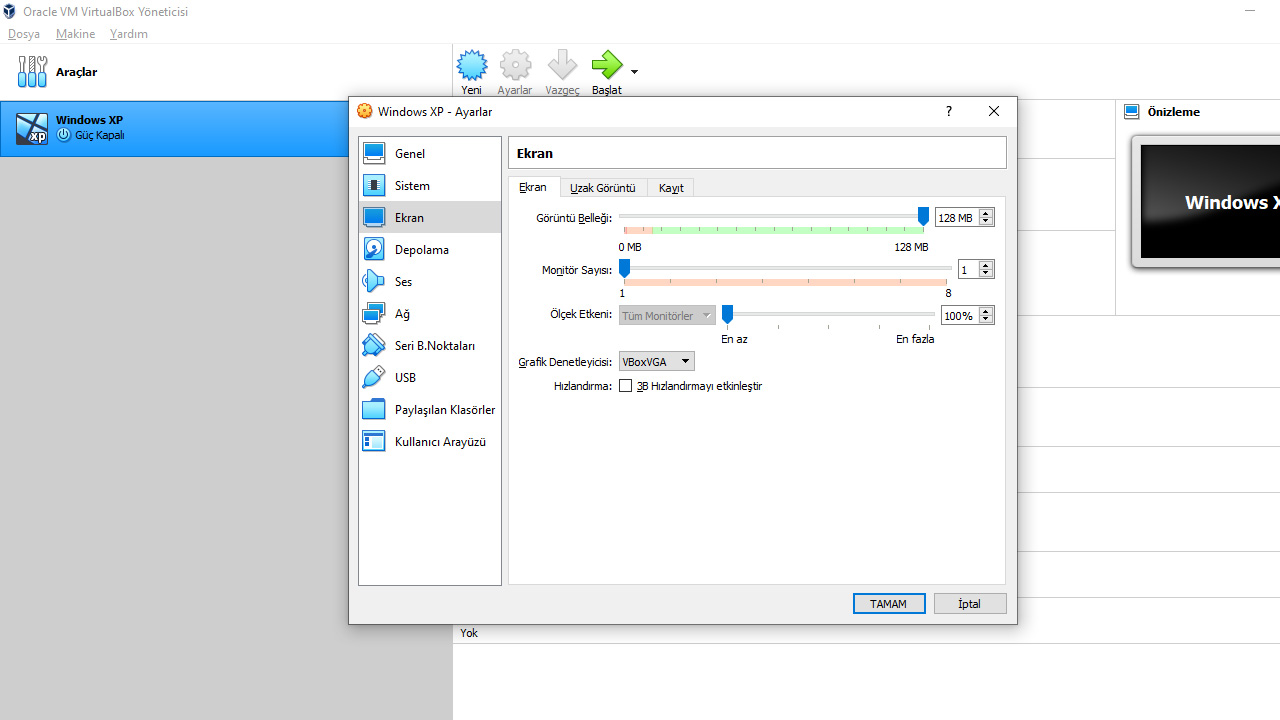
This time we visit the Display tab without closing the settings menu. After clicking the Screen tab, there will be the Image memory bar at the top of the menu that appears. Sliding this bar To 128 MB value we bring. After completing all these steps, we click on the OK button and the adjustments we will make are finished.
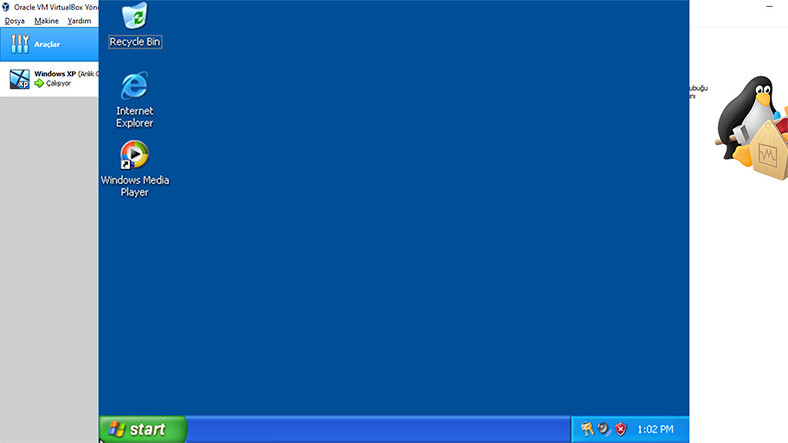
Step # 19: Press Start and your Windows XP virtual machine is ready for use.
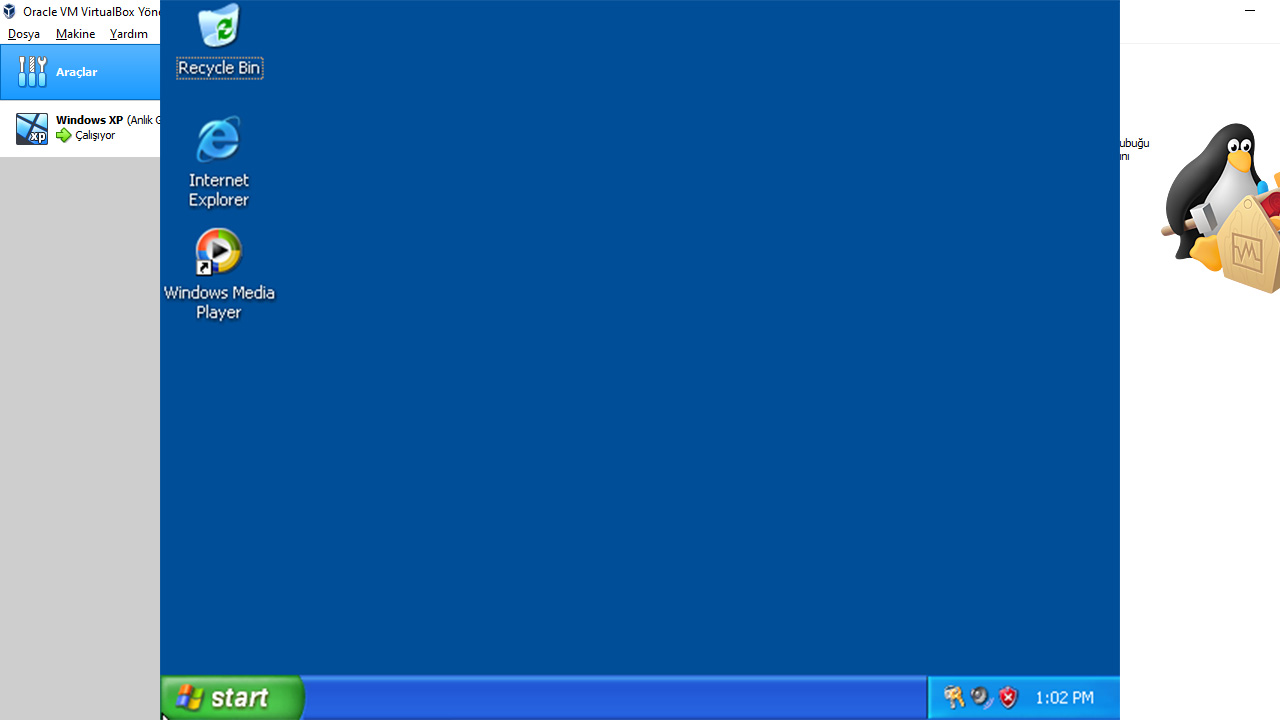
After completing all the operations and adjustments, we press the Start button on the VirtualBox main menu. In this way, VirtualBox will start your virtual machine for you. Since the Windows XP we downloaded is actually a setup file, the virtual machine Windows XP installation from scratch will do. After the installation is complete, you set a computer name and password.
After all installation processes are complete, your Windows XP virtual machine is ready for use. Now you can install nostalgic apps available in Windows XP, play games you miss and don’t work on Windows 10, or do whatever you want. 🙂
How to Install Linux (Ubuntu) on Windows?
Although creating a virtual machine using VirtualBox may seem like a complex and intimidating process, it is actually quite a simple process. When the steps are followed properly, there will be no reason for your virtual machine to not work. You Windows xp what do you think about What are the features of the Windows XP operating system that you miss the most? You can share your opinions with us in the comments section.