in

How to Remove Dust From Your Computer


Laptop computer producers suggest that customers contact service facilities if they need to take away mud from within their laptop to not lose their guarantee service. That’s why, even eradicating the again panel of the laptop computer might be unattainable with out particular instruments typically. Nonetheless, desktop computer systems might be cleaned at dwelling, even when you’re a novice person.
At Kimdeyir.com, we suggest utilizing this easy information if you need to take away the mud that retains your laptop from working correctly.

How to clear your PC monitor

You’ll want:

How to clear: Use compressed air to blow away mud whereas wiping the display with a dry microfiber fabric. Its materials is mild to the floor, it attracts mud and absorbs oils. If you might be coping with cussed stains, sprinkle a little water or a combination of water and vinegar (at a ratio of 1 to 1) on the material. The material must be comparatively dry so that the water or cleansing combination doesn’t get inside your laptop.

Tip: Don’t use paper tissues, they’ll scratch your monitor.

How to take away mud and dust from the keyboard

You’ll want:

  • compressed air duster
  • cleansing gel
  • microfiber fabric

How to clear: Disconnect the keyboard from the pc. Turn it upside down and shake it over the desk to eliminate any particles caught between the keys. If the keys are detachable, take away them earlier than shaking. Use the compressed air duster with a straw to blow soiled spots out of the case. The cleansing gel shall be useful too — apply it to the keyboard keys letting it squeeze between the smallest cracks of your keyboard (together with between the keys). Then take away it, it will suction up any crumbly bits or dust it touches. Wipe the keyboard with a dry microfiber fabric.

You May Also Like:  31 PERFECT IDEAS FOR YOUR LITTLE GARDEN

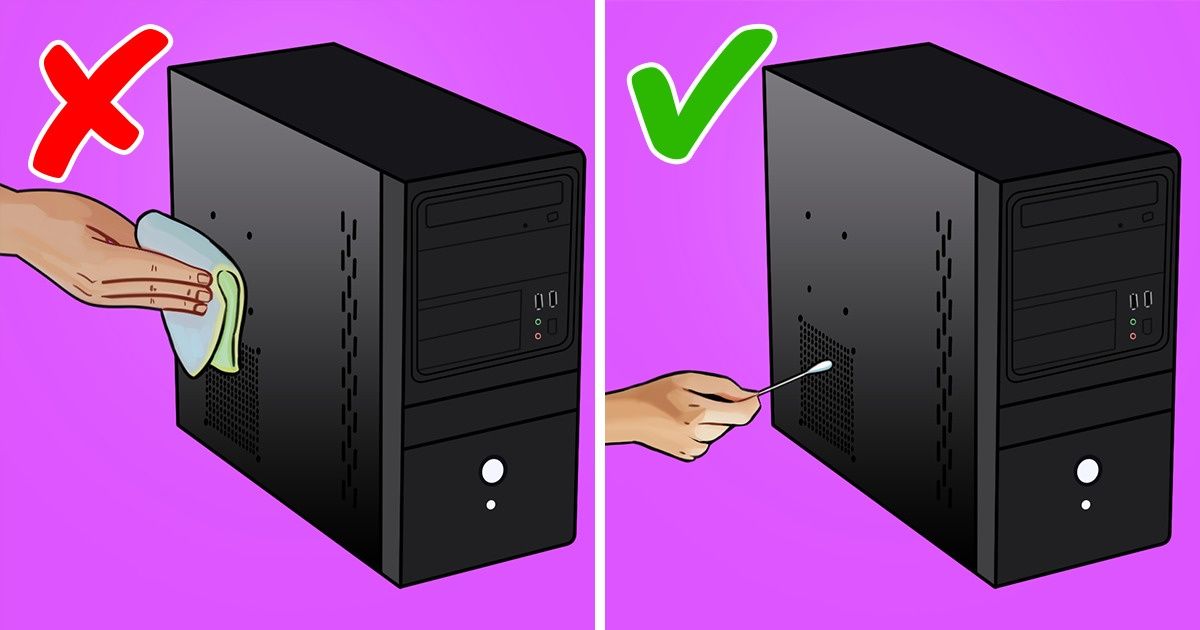
How to take away mud from within the system unit

You’ll want:

  • compressed air duster
  • rubbing alcohol
  • cotton swabs
  • ESD gloves
  • a screwdriver

Step 1. Flip off your laptop. Placed on ESD gloves to shield sure PC parts from potential harm from electrostatic discharge. Energy off the system unit by eradicating the ability cable. Take a photograph of the place all cables and cords are situated, after which disconnect them from the system unit. This photograph will make it easier to join them appropriately later. It’s additionally really helpful that you just take a photograph of the proper place of the parts and their mountings earlier than eradicating them. Then take away screws with a screwdriver and take off the system unit cowl.

Step 2. Use compressed air to take away mud and particles from the within of your laptop. The duster normally features a straw, with which you’ll be able to blow out mud from hard-to-reach locations. Whereas working, maintain the can at a distance of a couple of inches from the floor of the motherboard, processor, expansion cards, and laptop reminiscence. Press the spray button for a quick interval of time solely.
Step 3. Remove the mud buildup on your case followers with a can of compressed air. Maintain the fan together with your finger to maintain it from spinning when you’re blowing the compressed air onto it. Fan blades might be delicate and will crack if spun too rapidly. You need to use rubbing alcohol and wipe the blades with a cotton swab as a final touch.

You May Also Like:  GUMMY FOOD VS REAL FOOD CHALLENGE || Sneak Food Into Class! Eating Giant Candy by

Tip: If the followers are exhausting to attain or extraordinarily soiled, be happy to take away them from the case for simpler cleansing.

Step 4. Remove the mud buildup from the ability provide utilizing a can of compressed air. If your case has a mud filter beneath the ability provide, be positive to clear the filter too.
Step 5. The warmth sink and fan that’s mounted on your processor must be cleaned as effectively. If the buildup is too heavy, you might want to take away the warmth sink and fan from the processor to get it completely cleaned.
Step 6. Lastly, mud off all of the ports on the pc with compressed air and clear all the outside vents with rubbing alcohol and a cotton swab (paper tissues and a microfiber fabric gained’t enable you to clear the vents correctly). Now assemble the system unit, join all of the wires, and plug in your laptop. Accomplished!

Tip: If you retain your laptop on the bottom or on carpet, attempt to bear in mind to clear your laptop each 6 months or so. If your laptop sits on a desk, yearly intervals must be fantastic.

Dikkat: Sitemiz herkese açık bir platform olduğundan, çox fazla kişi paylaşım yapmaktadır. Sitenizden izinsiz paylaşım yapılması durumunda iletişim bölümünden bildirmeniz yeterlidir.

Leave a Reply

Your email address will not be published. Required fields are marked *

This site uses Akismet to reduce spam. Learn how your comment data is processed.

Güven Yüreyi – Başka Biri [Dinle – İzle – İndir]

Flood Insurance Secret – Your Homeowners Insurance Probably Doesn’t Cover You!