
You’ll want
- A quilling software that appears like a lengthy pen with a metallic nozzle. It is used to make the method of rolling paper simpler. Typically there will be an axe at the opposite finish that additionally eases the working course of.
- Paper strips for quilling. Often, they’re offered as a part of a set they usually differ in width. You may also reduce them your self, however be certain that to select thick paper so that it retains its form nicely when creating rolls.
- A fixative — this may be PVA glue, glue for cardboard, or a glue-gun. It’s handy to apply glue to the little particulars with the assistance of a toothpick.
- Tweezers
- Scissors with pointed edges to flip strips of paper into advantageous fringe
- Quilling stencil ruler with holes, which makes it straightforward to make curls of the identical dimension and form
Tip: You may also make a backing from cork or foam to glue small elements on, moreover you’ll be able to fasten them along with the assistance of tailor’s pins till the glue units.
How to make fundamental shapes
Step 2. Take away the quilling software. It is best to get a roll that may be used for creating numerous shapes.
- Drop
- Wave
- Curved drop
- Open roll
- Free roll
- Tight roll
- Eye
Please be aware: If the tip of the roll is not supposed to stick out, then it needs to be glued to the roll. Additionally, there are many different parts which you could be taught to do with the assistance of video classes.
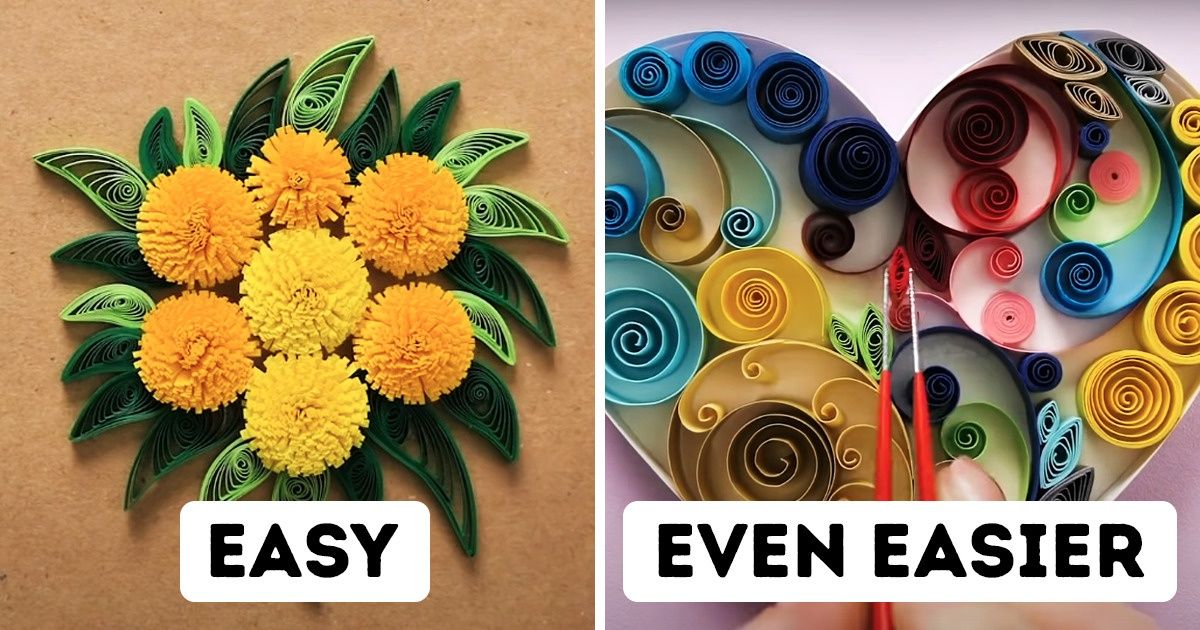
Picture #1. Adorned coronary heart
Step 1. Lower a coronary heart in a desired dimension out of thick paper. Afterward, make its partitions with the assistance of white-colored strips. You’ll get a form that you simply’ll later be filling with numerous parts. Please be aware that the width of the strips for the guts’s partitions and the weather within it needs to be the identical.
Step 2. Utilizing tweezers, precisely place the primary factor inside the guts, having beforehand utilized glue to the decrease floor of the factor.
Step 3. By repeating the identical actions, first fill the higher left a part of the guts with numerous parts.
Step 4. Then transfer to the best half, and later begin filling the decrease half. Mix numerous parts with one another, creating uncommon patterns.
Picture #2. A bouquet of dandelions
Step 1. Take a strip of yellow paper.
Step 2. Flip its finish into fringe with the assistance of scissors.
Step 3. Take a quilling software and roll up all the strip. Safe the top at the top of the roll so it doesn’t unroll.
Step 4. Utilizing your fingers, gently fluff the perimeter, shifting from the sting of the roll to its center to make a flower, as it’s proven in the photograph above.
Picture #3. Aster flower
Step 1. Make a roll from burgundy-colored paper.
Step 2. Let it get a bit free by weakening your maintain.
Step 3. Squeeze the sting along with your fingers to get the “drop” factor.
Step 4. Squeeze the opposite finish with tweezers to make the petal’s finish pointed.
Utilizing this methodology, make:
- 14 massive petals in burgundy
- 13 middle-sized petals in darkish crimson
- 12 crimson petals in a smaller dimension
- 11 pink petals in an even smaller dimension
- 1 white flower. This needs to be achieved in the identical method as the dandelions above, however in this case, you must wrap it round a small tight roll, which is required to function the core of the flower.
Step 6. Place the darkish crimson petals over them, shifting them nearer to the middle of the circle.
Step 7. Glue the crimson and pink petals over them in the identical method.
Step 8. Connect the white flower to the middle, after having made the fluffy core. If you’d like, you’ll be able to create a number of comparable flowers and adorn them with different parts, including leaves and twigs to create a bouquet of asters.
Picture #4. Unique flowers on bamboo sticks
Step 1. Take 5 bamboo sticks and place them parallel to one another at a brief distance aside. Apply glue on high.
Step 2. Glue 5 extra bamboo sticks to them so that you simply get a lattice.
Step 3. Paint it white and switch it over the way in which it’s proven in the photograph above.
Step 4. Use it as a base for creating a flower composition: first glue leaves, then large petals over the leaves, then smaller petals, and don’t overlook in regards to the core.
Thus, you’ll get a image with out a body that may look good on the wall of a contrasting shade.