
Method № 1
Step 2. Put a thread across the twine.
Step 3. Begin making a knot and put the left finish below the twine after which above the loop of the longer term knot.
Step 4. Tighten the knot.
Step 5. Repeat, making increasingly more knots. When the thread turns into brief, make a common knot. You too can use a drop of glue if wanted. Proceed wrapping the twine.
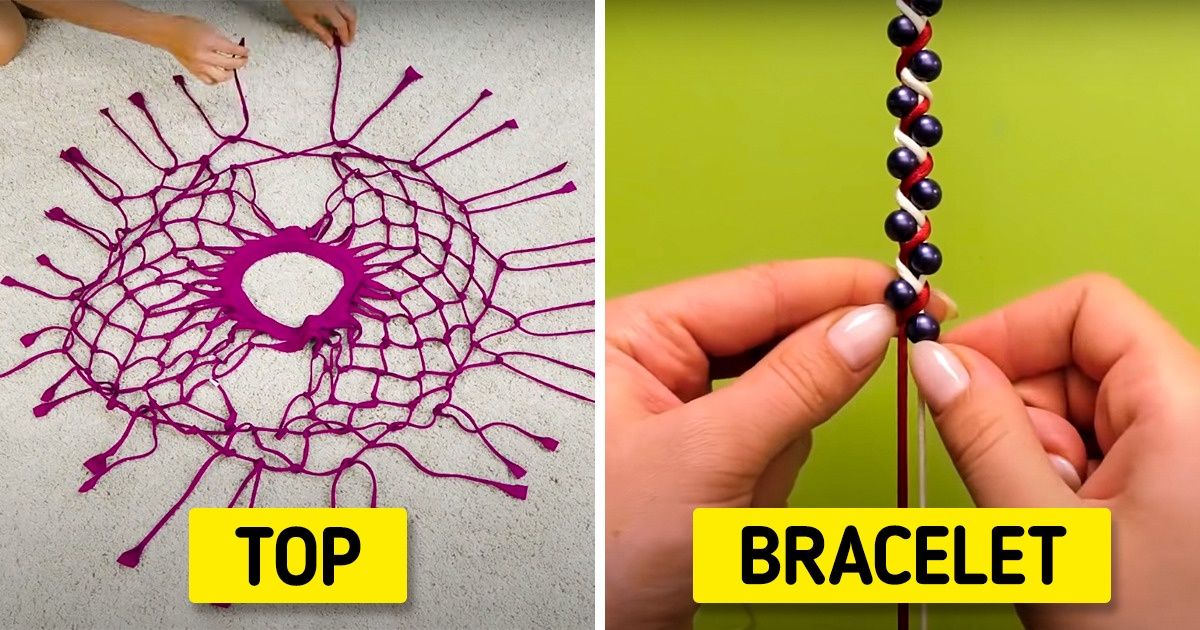
Step 6. Change the colours of the thread to make the consequence look extra fascinating.
Method № 2
Step 2. Put it across the left finish.
Step 3. Put it below the bottom and below the start of the proper tip.
Step 4. Tighten the knot.
Step 5. Now take the left finish of the lace and repeat.
Step 6. Hold making new knots till the bracelet is lengthy sufficient.
Method № 3
Step 1. Fold a lace in half and connect it to the desk utilizing tape. This will likely be your base. Tie one other lace to it. Take its left finish and make a loop. The best finish ought to go above by means of the loop.
Step 2. Put it below the bottom and thru the loop.
Step 3. You need to have a knot like the image above exhibits.
Step 4. Tighten it and repeat.
Method № 4
Step 1. Reduce a thread lengthy sufficient so when it’s folded in half, it’s a bit longer than the longer term bracelet.
Step 2. Put round 10 beads on it. Make positive the thread is folded in half.
Step 3. To one finish of the double thread, tie one other thread.
Step 4. Make a few knots as we did utilizing “Method № 2.” Then, make one other knot like this across the bead.
Step 5. Make a few extra knots with out beads after which one with it. Hold going till the bracelet is lengthy sufficient. If wanted, you’ll be able to add extra beads.
Step 6. As soon as the bracelet is finished, put it on your wrist and safe it by placing the tip by means of the loop.
Method № 5
Step 1. Utilizing a paper clamp, connect it to a lace in the center. This will likely be the bottom to your bracelet. Take one other lace that you’ll work with. Put it across the left finish of the bottom, as the photograph above exhibits.
Step 2. Match the higher finish of the second lace in the clamp. Utilizing the free finish, wrap the proper finish of the bottom. Put the loop up to the clamp.
Step 3. Make one other loop as the photograph exhibits.
Step 4. Repeat the identical on the left and on the proper.
Method № 6
Step 1. Take an previous T-shirt, fold it in half vertically, and minimize off the perimeters along with the sleeves. You need to solely have the center with the neck.
Step 2. Reduce the T-shirt into strips and don’t contact the neck.
Step 3. Put it on the ground so that the strips unfold out from the neck. Tie them collectively to make the primary row of knots.
Step 4. Do the second row the identical method.
Step 5. Hold doing it alongside your complete size making increasingly more rows.
Step 6. Don’t overlook to depart some area for the arms. You too can add beads if you want.
Bonus: Simple macramé earrings
Step 1. Take a plastic financial institution card and wrap it with mouline thread.
Step 2. Reduce by means of the thread at the decrease fringe of the cardboard.
Step 3. Wrap the threads you could have round a spherical earring. Tie it as the photograph above exhibits. Reduce off the free ends.
Step 4. Add extra decorations like this to your earrings.

